This article is part of Cerexio’s Enterprise Big Data Management. It discusses basic Hadoop commands to deal with existing Hadoop clusters in terms of copying files, moving files or creating directory etc. Hadoop is a big umbrella term that comprises a lot of tools and technologies to power up big data management to fit the decision-making processes. All these tools use HDFS known as Hadoop Operating System to get the data and process it. Assume that you are already familiar with the Hadoop environment, and related Hadoop ecosystem.
Hadoop authentication is enabled by admin to access the HDFS needs, and this can be done using Kerberos or standard computer user name-based authentication. This article explains how to allow a normal computer name-based authentication.
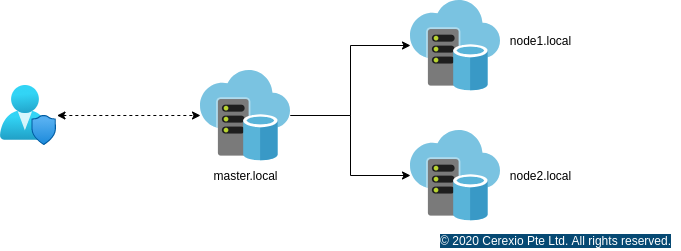
There are two ways we can create a user director within HDFS, firstly by creating through a direct logging into the namenode and doing the following operation. Secondly, for better ease, users have the option of equipping the Cerexio’s DataXio environment to create users interactively. Assume that you have your Hadoop environment setup like following, where we have
					master.local - Master node has all the master components running
(NameNode, ResourceManager, SparkServer, HiveMetaServer etc), node1.local
and node2.local installed with DataNode, NodeManagers etc.

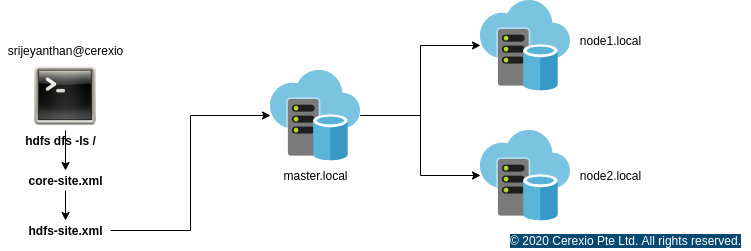
Now the user ‘srijeyanthan’ is created with the permission to read/write/execute. Our next step is to perform a hdfs file system operation from your own computer without logging into the Hadoop Cluster.

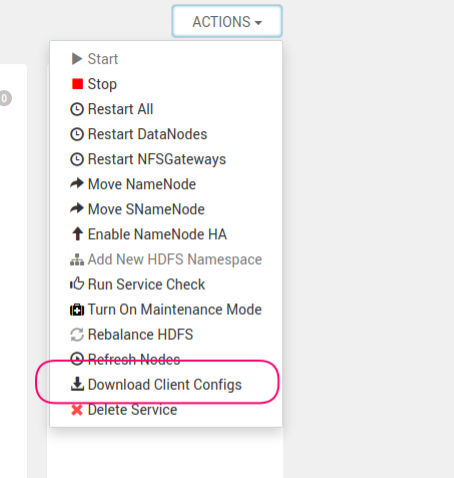
In order to access Hadoop HDFS from srieyanthan@cerexio, there are two important cluster configurations needed, namely, hdfs-site.xml and core-site.xml. We can copy this directly from your Hadoop Cluster NameNode, or use the DataXio environment to download.
					1.Download it from the following URL and save it in /home/srijeyanthan/hadoop https://www.apache.org/dyn/closer.cgi/hadoop/common/hadoop-3.1.4/hadoop-3.1.4.tar.gz

2.Extract all the files created in /home/srijeyanthan/hadoop directory

3.Open the ~/.bashrc and add HADOOP_HOME as following HADOOP_HOME=/home/srijeyanthan/Downloads/hadoop-3.1.4 and add PATH variable as export PATH=$PATH:$HADOOP_HOME/bin

4.Now we are set with all the configuration, and ready to access the HDFS environment. Normally, when we execute hdfs command from the terminal, Hadoop binary translate those commands using cluster core-site.xml and hdfs-site.xml as follows

					hdfs dfs -put
hdfs dfs -copyFromLocal
hdfs dfs -get
hdfs dfs -copyToLocal
hdfs dfs –cat /path_to_file_in_hdfs
hdfs dfs -mv

hdfs dfs -cp
hdfs dfs -moveFromLocal
hdfs dfs -tail [-f]
hdfs dfs –rm